Broken Bank Notes From The 1800’s

This sounds like a plot from a book or even a movie, but this actually happened with the banking system.  During the early 1800’s, the banking system was not as safe as it is today.  The banks would go out of business almost as fast as they would open their doors for the first time.

When a bank opened, they were allowed by the United States Government through a charter to print their own paper money.  This was to help the country get the monetary system up and running.

But when a bank went out of business, the money that it produced became worthless.  With the country being on the gold and silver standard at the time (which means paper money could basically be traded in for silver or gold coins that equaled the face value of the paper money), it was impossible to take the  worthless money in to redeem it.

So how did businesses and other banks know that a bank had gone out of business?  The most common method was to check a list of out-of-business banks, which were also called “broken banks.”  The list was updated, but it did take time to get it out to everyone.  The main problem that people faced is that banks folded after the list was updated, leaving some businesses with worthless money in exchange for goods and services.

Because it was so problematic, the banking system stopped printing money—it became the job of the BEP (which is the Bureau Of Engraving And Printing).  This early form of printing paper money created two types of collectibles—“Broken Bank” Notes and Obsolete United States paper money!

Have you ever run across this type of paper money?

What are some tricks that produce great photographs of jewelry?

When it comes to selling jewelry, it is often said that a picture is one of the best-selling tools that you have.  What are some of the tricks that can you use to produce a fantastic photograph?

There will be times when you produce nothing but blurred, out-of-focus pics, or photos that show the item off-center.  A simple tripod will help you eliminate these problems.

I often use a mannequin arm to highlight the beauty of a bracelet or ring, and a bust or a necklace display.  Another option is to use a real-life model for the jewelry.  This could be your sister, brother, or even one of your children.  This type of display helps the buyer know what the jewelry could look like when they have it on before they purchase it.

Don’t be afraid to play with the settings on a camera.  We all know that digital cameras come with a macro setting.  Make sure to try the settings for night shots, fireworks, or even snow pictures as well.  You never know which setting will show off a piece’s best attributes!

Take a ton of pictures along the way.  Play with the angles of the photograph, and even use the flash of the camera.  You can even put a table lamp near the jewelry near the jewelry to help give the stones in the piece more of a sparkle affect.  What works for me is to use natural daylight.

I even play with the background as well.  If you have something that has a silver tone to it, a dark backdrop behind or underneath it really plays up the shine.  A piece of construction paper can be all the backdrop you need.

Another way that you can make those pictures “pop” is to take a piece of glass (this can be from a picture frame that you are not using anymore) and lay it on top of a piece of colored construction paper—the reflection of the jewelry can be picked up in the glass. There is a product called a light box, which can produce a “halo” effect around something like a pendant.  Instead of investing tons of money on this equipment, a flashlight can come very close to doing the same effect.

So what kinds of tricks do you use to take photos of jewelry?

DIY TIP: How do you wire a lamp?

You are walking through your favorite flea market or antique mall one day and you see a lamp that would look great in your house or apartment.  You start to look at it to see what kind of shape it’s in, and you notice the cord is frayed.  How do you change it so that you can use the lamp?

The first thing you need to find is a replacement cord.  A local home improvement store will more than likely have a replacement for you.

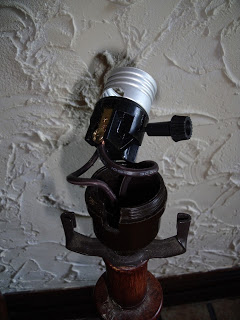
The next thing that you need to do is to disassemble the light socket so that you can get access to where the cord attaches.

When you get the main cover of the socket off, you will notice that the end of the cord that you are going to replace is held on by a couple of screws.  All you need to do is to unscrew the cord and slide the cord out at the base of the lamp.

A piece of advice: I would look at the socket before I did anything else.  I’ve seen sockets with rust, corrosion and damage to where it would be unsafe to turn the lamp on.  If there’s anything wrong with the socket, it’s a good idea to replace it now.  More often than not, you’ll get a replacement socket when you buy the cord.

Installation of the cord is just as easy as removing it.  The first step is to feed the cord through the lamp in the area where you removed the old one.  When you get the cord all the way through the lamp, leave yourself a little extra room so that you can attach the light socket.

When you purchase a new cord at a home improvement store, it will have the end of the cord already stripped for you so that you can reattach it without having to worry about stripping the wire.  After you get the new cord on, pull on the cord at the bottom of the lamp to remove all of the extra slack that you gave yourself.

After you take out the extra slack in the cord, all you have to do is to put the cover on the light socket.  If I were you, I would put a light bulb in it and plug it in to see if it works after I put the socket cover on.

When it works, you can put on the lamp shade and proudly display your latest find.  What kinds of finds have you run across that needed a little repair work like this?

What a great store display!

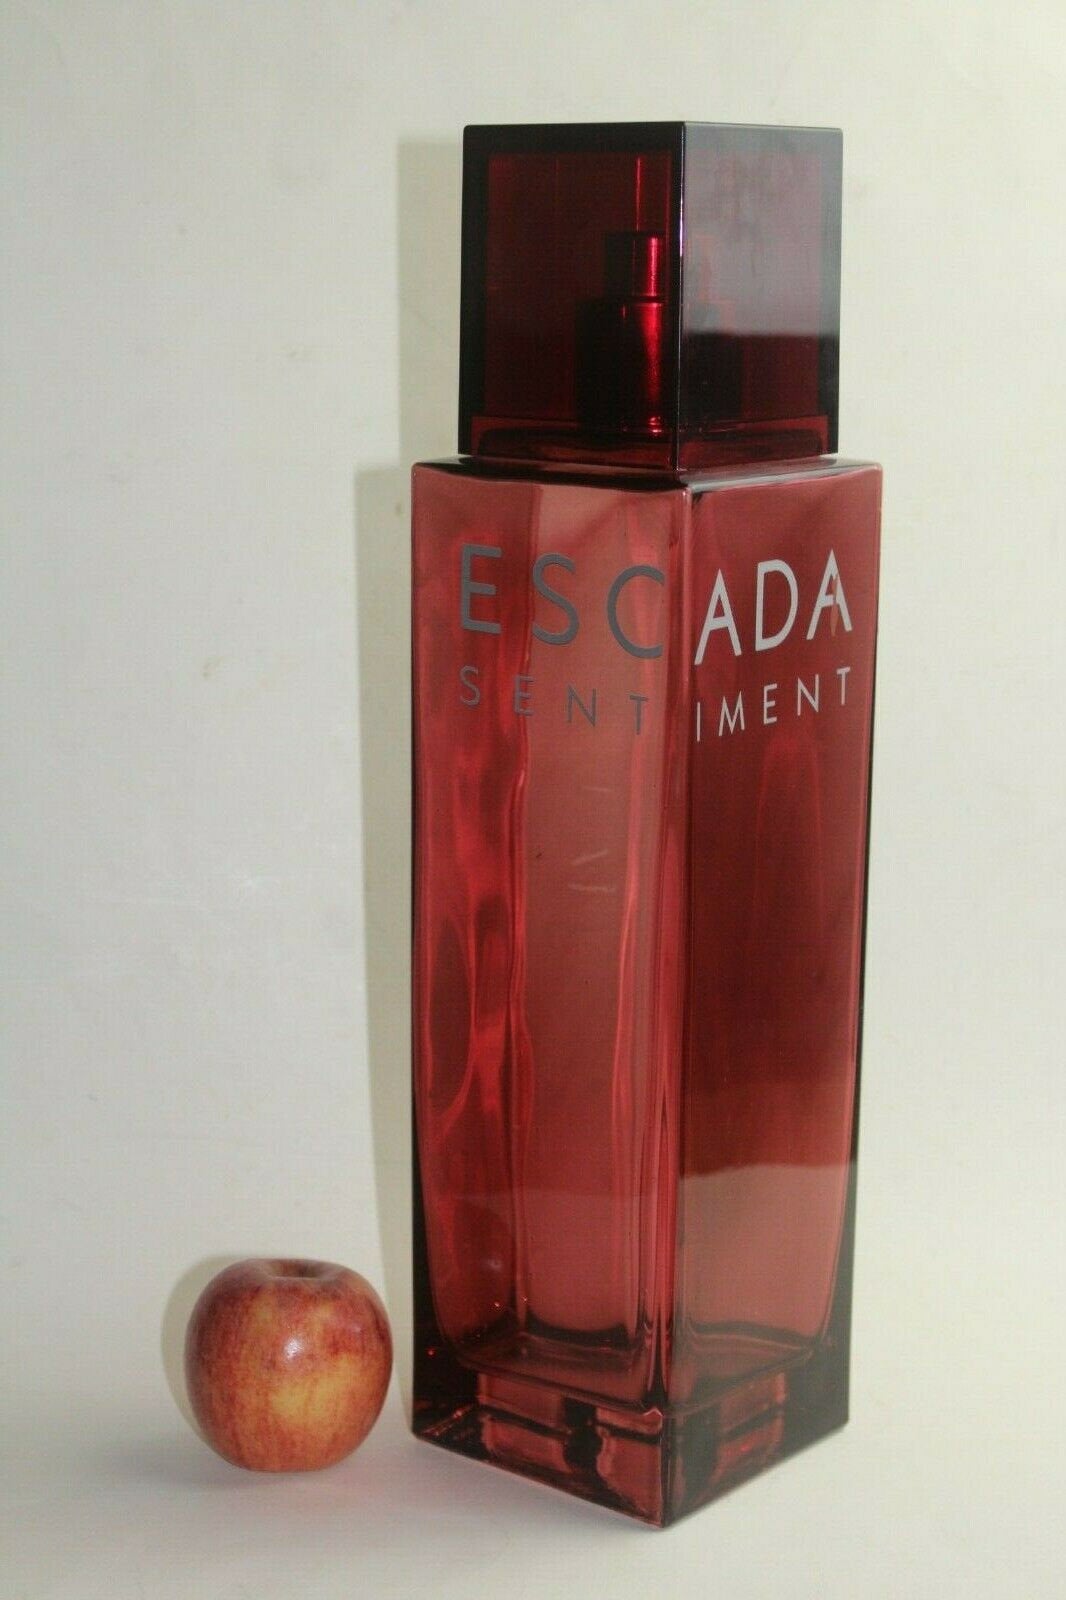
Occasionally, you will find something for sale that makes you stop for a second in amazement.  It could be just about anything—something like this ESCADA SENTIMENT store display.

ESCADA SENTIMENT By Escada is a men’s cologne that was first sold in 2002, and it was more commonly sold in department stores.

This store display bottle was found on the countertop of the fragrance department in department stores that sold the fragrance.  The bottle is a large glass bottle with a cranberry color, and it has a plastic lid and atomizer. Both the lid and atomizer are removable, and the store display has the same artistic / triangular shape as the normal bottle.

The store display is huge—it measures 14 ¾ inches tall including the lid and 5 inches at the base.

Since this was a store display, it was more than likely sat with similar display pieces to show off what the store was selling.

I love the shape of the bottle—it looks like it came out of the Art Deco era with the front having a triangular shape and the geometric shapes of the back.

This is one type of store display that you can find—what other types of displays have you run across?